Assets should always be checked-in one at a time as they are physically handed in by a student or staff. This is most easily performed using the K12 Asset Pro mobile barcode scanner. You can find instructions for that here: https://youtu.be/WTsiTUBwASc?si=6v3TXaqVcMkQNxnA&t=166
If you DO need to bulk checkin assets that you have confirmed have been turned back into your district there are two methods that you can use as a workaround to do that. We recommend you be very sure that all assets have been accounted for before using these methods.
Method 1
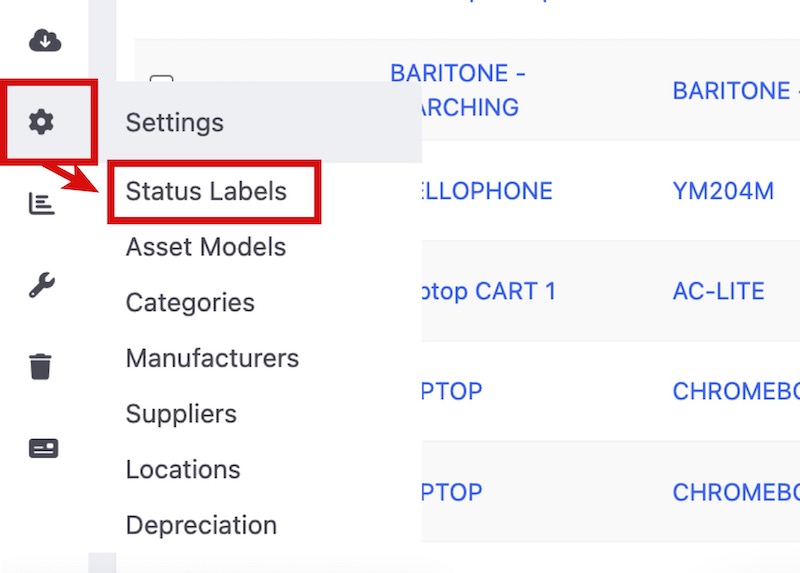
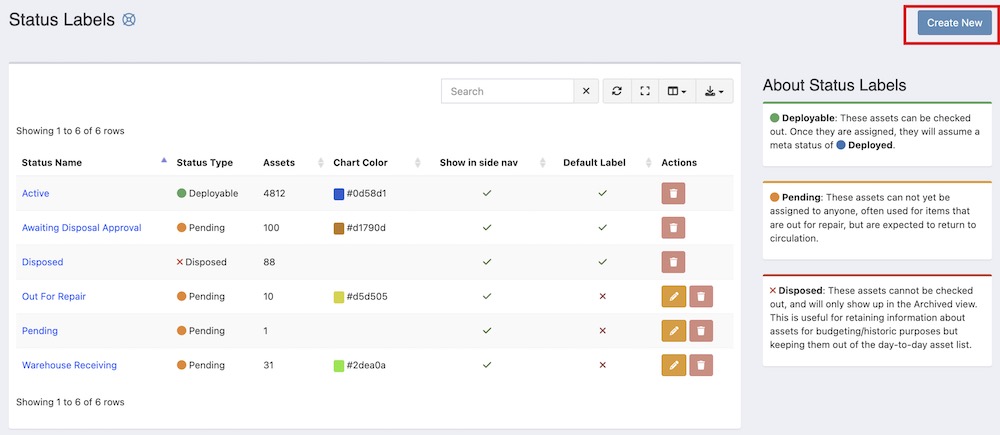
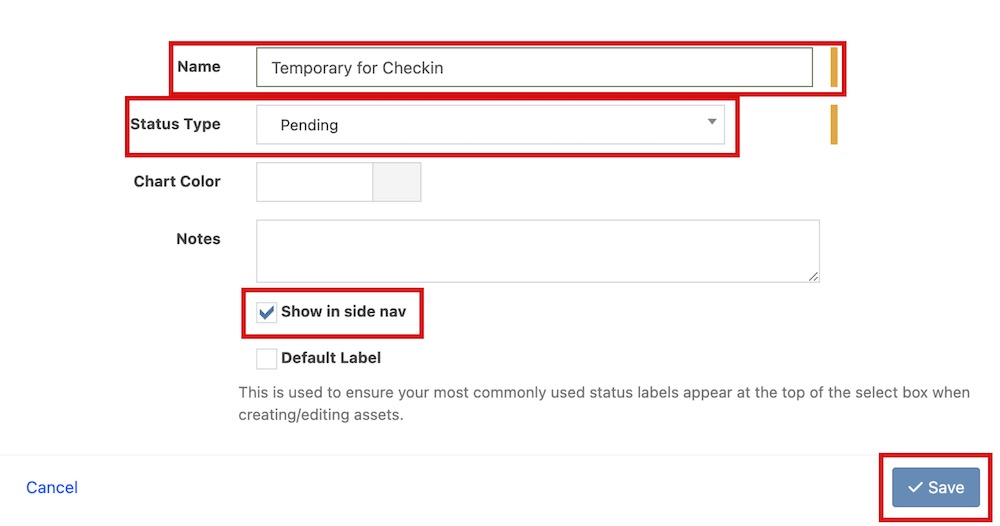
1) Create a new temporary asset status to use for this process: Use the gear icon on the left side navigation to select “Status Labels” Then click on “Create New” to create a new status label, we suggest you call it “Temporary for Checkin”. Be sure to set the Status Type to “Pending” and check the Show In Side Nav box.
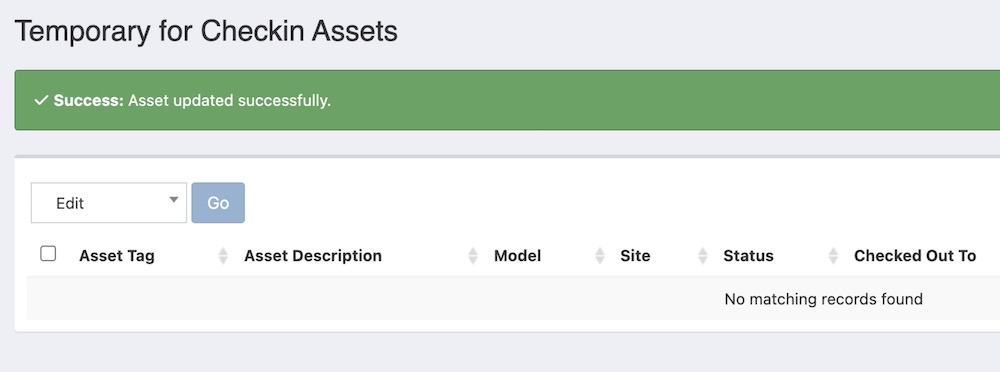
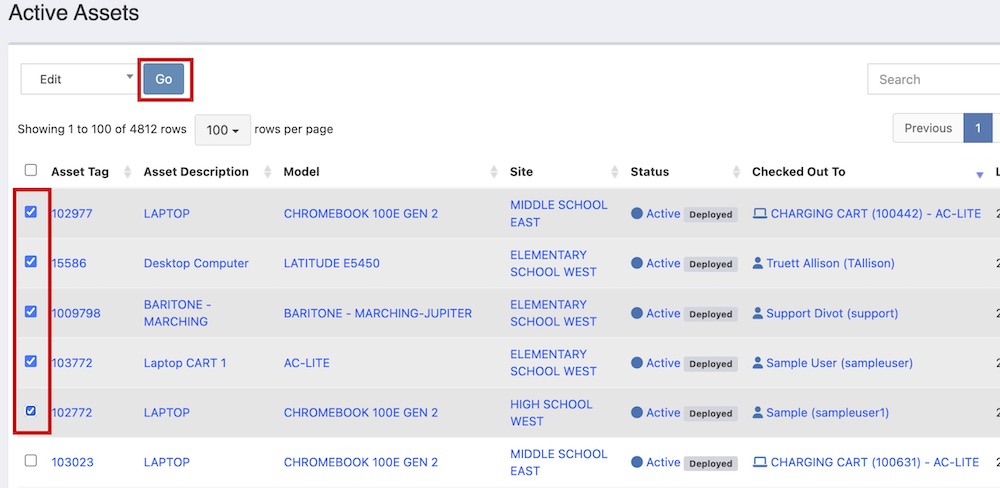
2) Next, select the check box next to any assets you want to check-in. If you want to select all the assets on a visible page just click the check box at the top of the row that will activate all check boxes on the page. Then click the “Go” button next to the Edit dropdown.
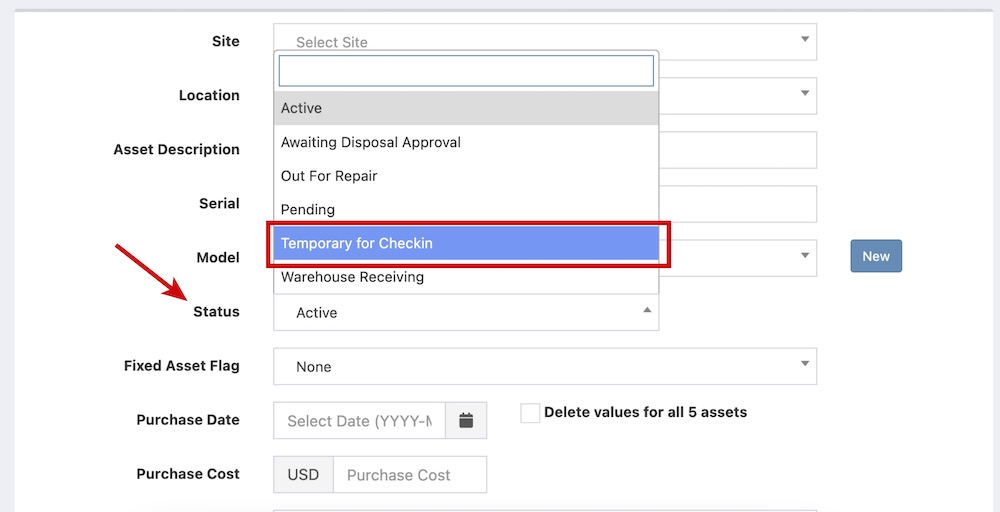
3) You are now bulk editing these assets. Update their status to the new temporary status that you create. You are taking advantage of the fact that the system will automatically check-in any asset that us in a “Pending” type of status (normally this would be for things like Out for Repair or Awaiting Disposal Approval, but we are using this as a workaround). Then click Save.
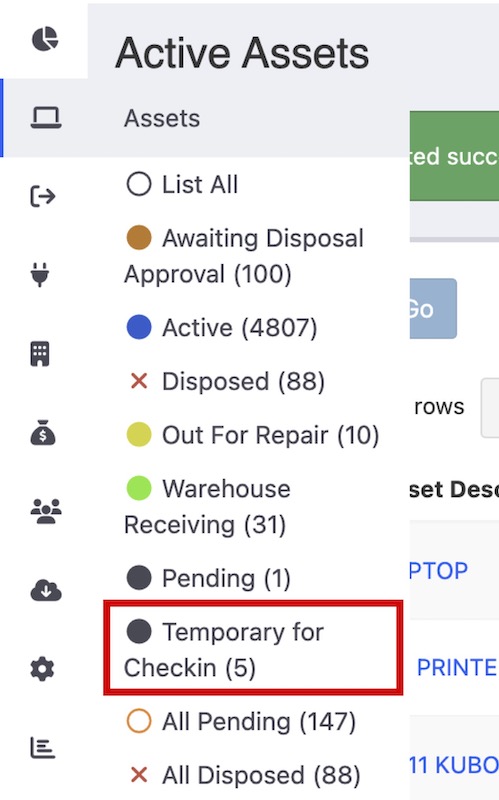
4) All of these assets will now be checked back into the system however we need to return them to an Active status so that they can be checked out again to new students/staff. On the left side navigation hover over the Assets symbol and then select the new status that you have created and just updated all your assets to.
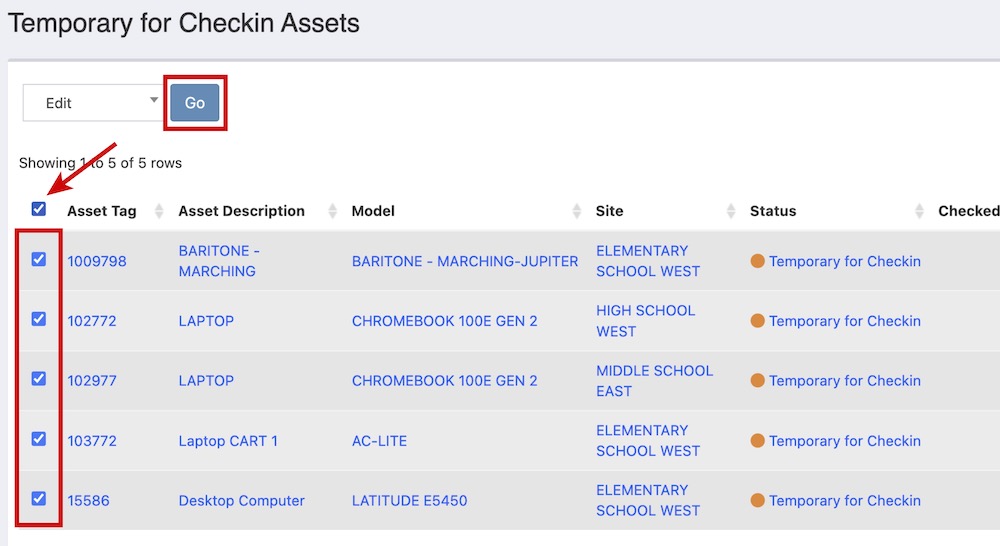
5) Now you will bulk edit these assets again to update them back into an Active status so that they are available for checkout again. Just like in Step 2 you will select all these assets and then click the “Go” button to bulk edit the assets.
6) Set the bulk edit Status to “Active” and hit Save.
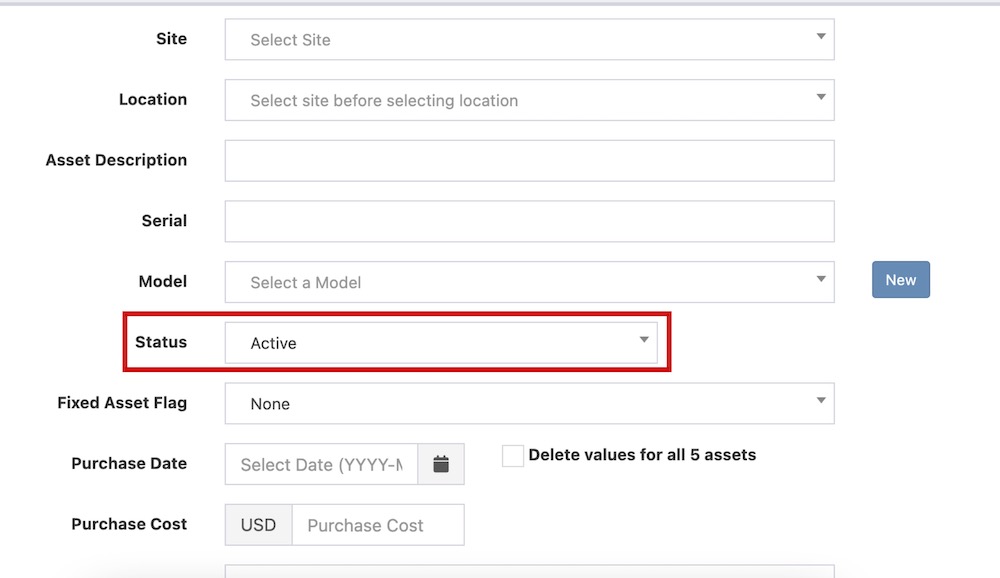
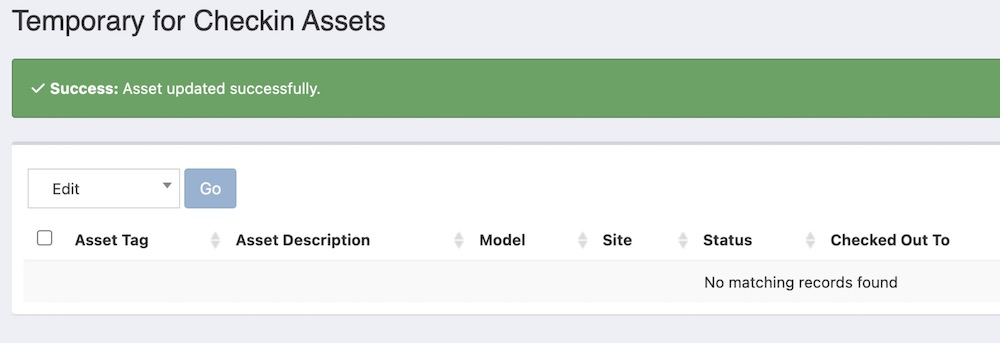
7) All of your assets have now been checked back in and you are ready to check them out to new users!
Method 2
This method will use a spreadsheet upload to help us checkin the assets.
1) Create a new temporary asset status to use for this process: Use the gear icon on the left side navigation to select “Status Labels” Then click on “Create New” to create a new status label, we suggest you call it “Temporary for Checkin”. Be sure to set the Status Type to “Pending” and check the Show In Side Nav box.


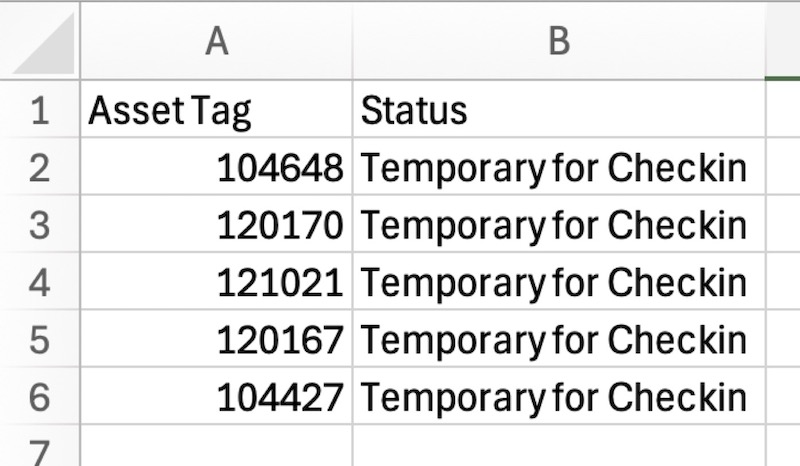
2) Create a spreadsheet with two columns, one for the Asset Tag number and one for Status with the new temporary status label in it. Be sure to save this file as a .CSV
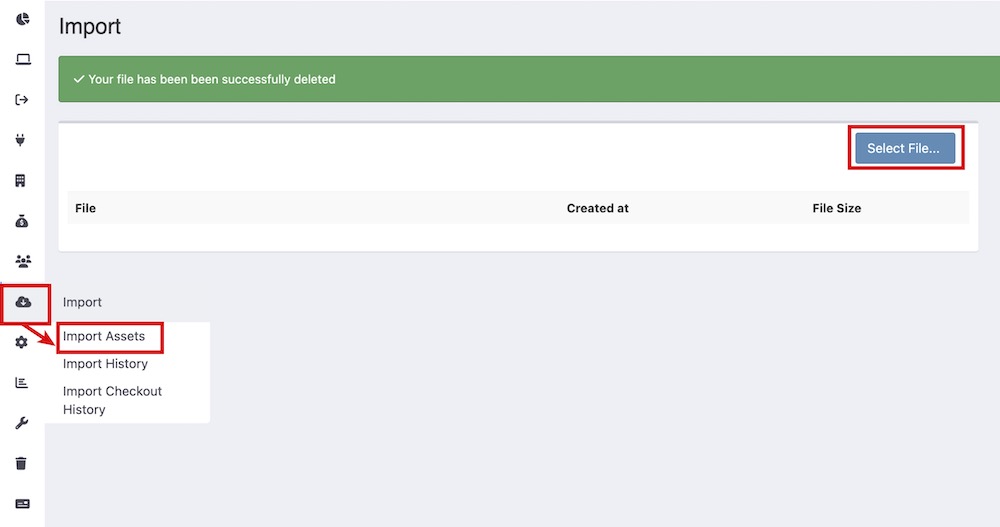
3) On the left side navigation hover over the import symbol and then select “Import Assets”. Then click on the “Select File” button and choose the .CSV file that you have created.
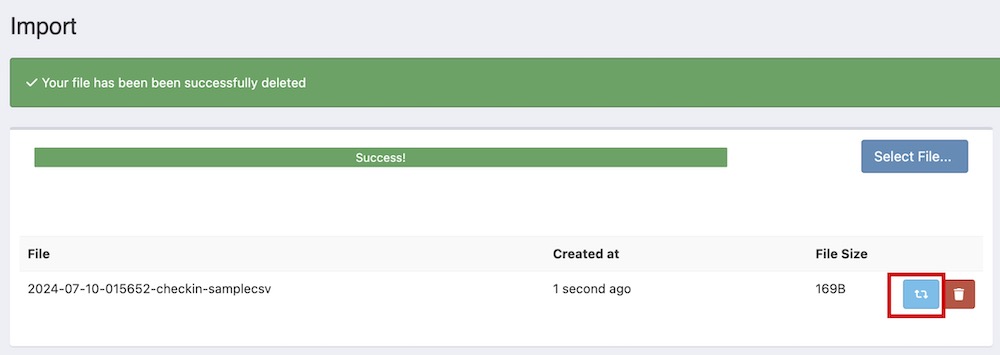
4) After your file has been uploaded, click on the blue button to start the import.
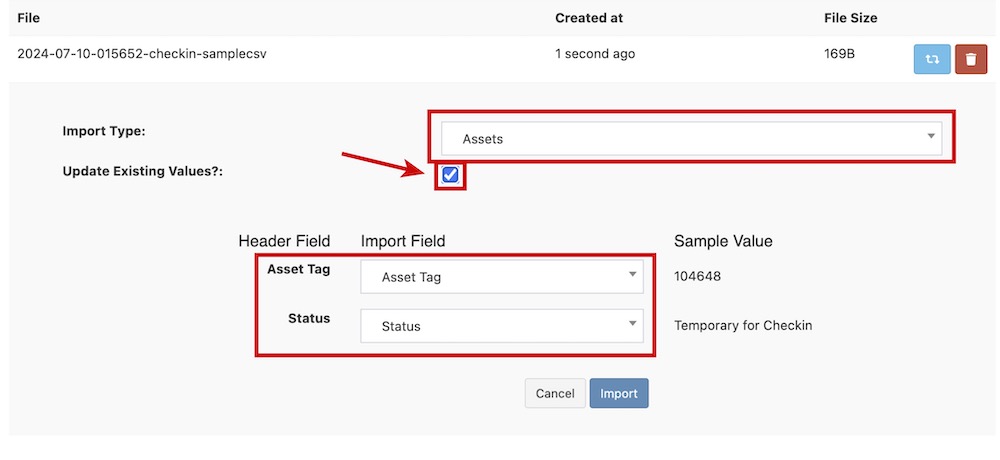
5) For the Import Type select “Assets” then be sure to check the box for “Update Existing Values.” Your header fields should be automatically mapped to the import fields, but if not use the drop down menus to proper assign the right header to Asset Tag and Status. The click the “Import” button.
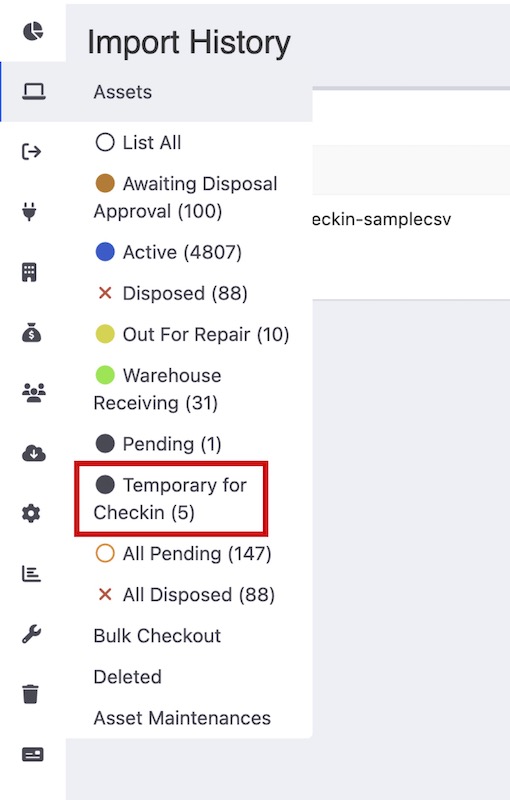
6) You will be redirected to the Import History window and the status will display a green Uploaded message when complete.

7) All the assets that you want to check-in will now have the Temporary for Checkin status. On the left side navigation hover over the symbol for Assets and then select the status for “Temporary Checkin”.
8) Now you want to select all the assets in this status. It is easiest if you view enough rows per page to fit all your assets, then you can click the check box at the top of the row that will activate all check boxes on the page. Then click the “Go” button next to the Edit dropdown.
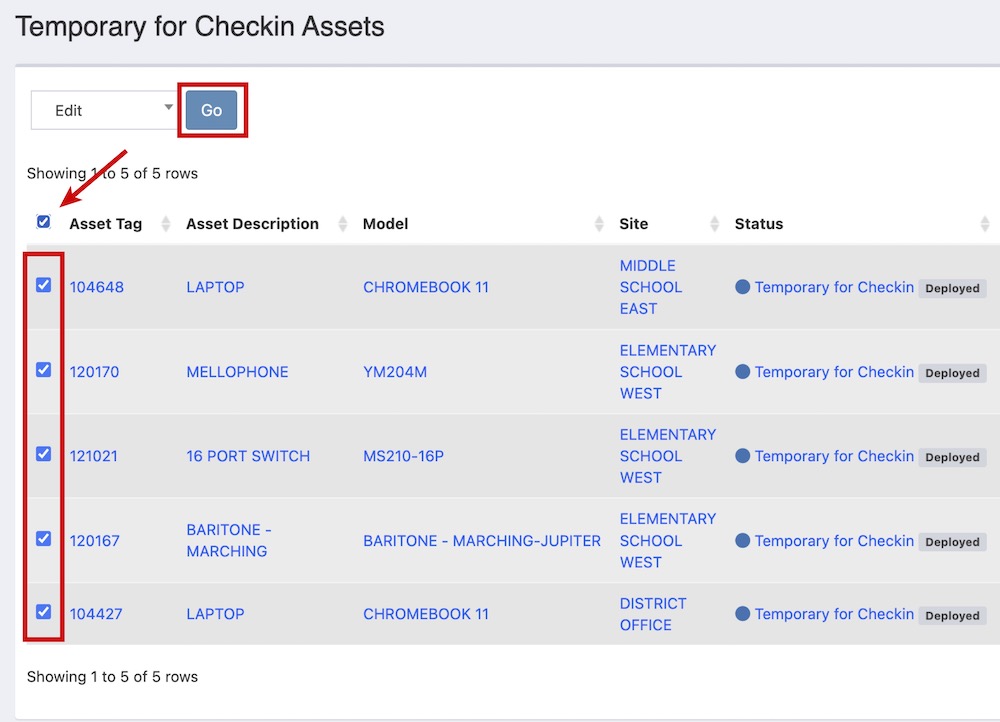
9) You are now bulk editing these assets. Even though these assets are already in the “Temporary for Checkin” status we still need to go through this step. You are taking advantage of the fact that the system will automatically check-in any asset when it is switched into a “Pending” type of status (normally this would be for things like Out for Repair or Awaiting Disposal Approval, but we are using this as a workaround) so we need to again switch these assets into the status of “Temporary for Checkin” again. Then click Save.

10) All of these assets will now be checked back into the system however we need to return them to an Active status so that they can be checked out again to new students/staff. On the left side navigation hover over the Assets symbol and then select the new status that you have created and just updated all your assets to.

11) Now you will bulk edit these assets again to update them back into an Active status so that they are available for checkout again. Just like in Step 2 you will select all these assets and then click the “Go” button to bulk edit the assets.

12) Set the bulk edit Status to “Active” and hit Save.

13) All of your assets have now been checked back in and you are ready to check them out to new users!
