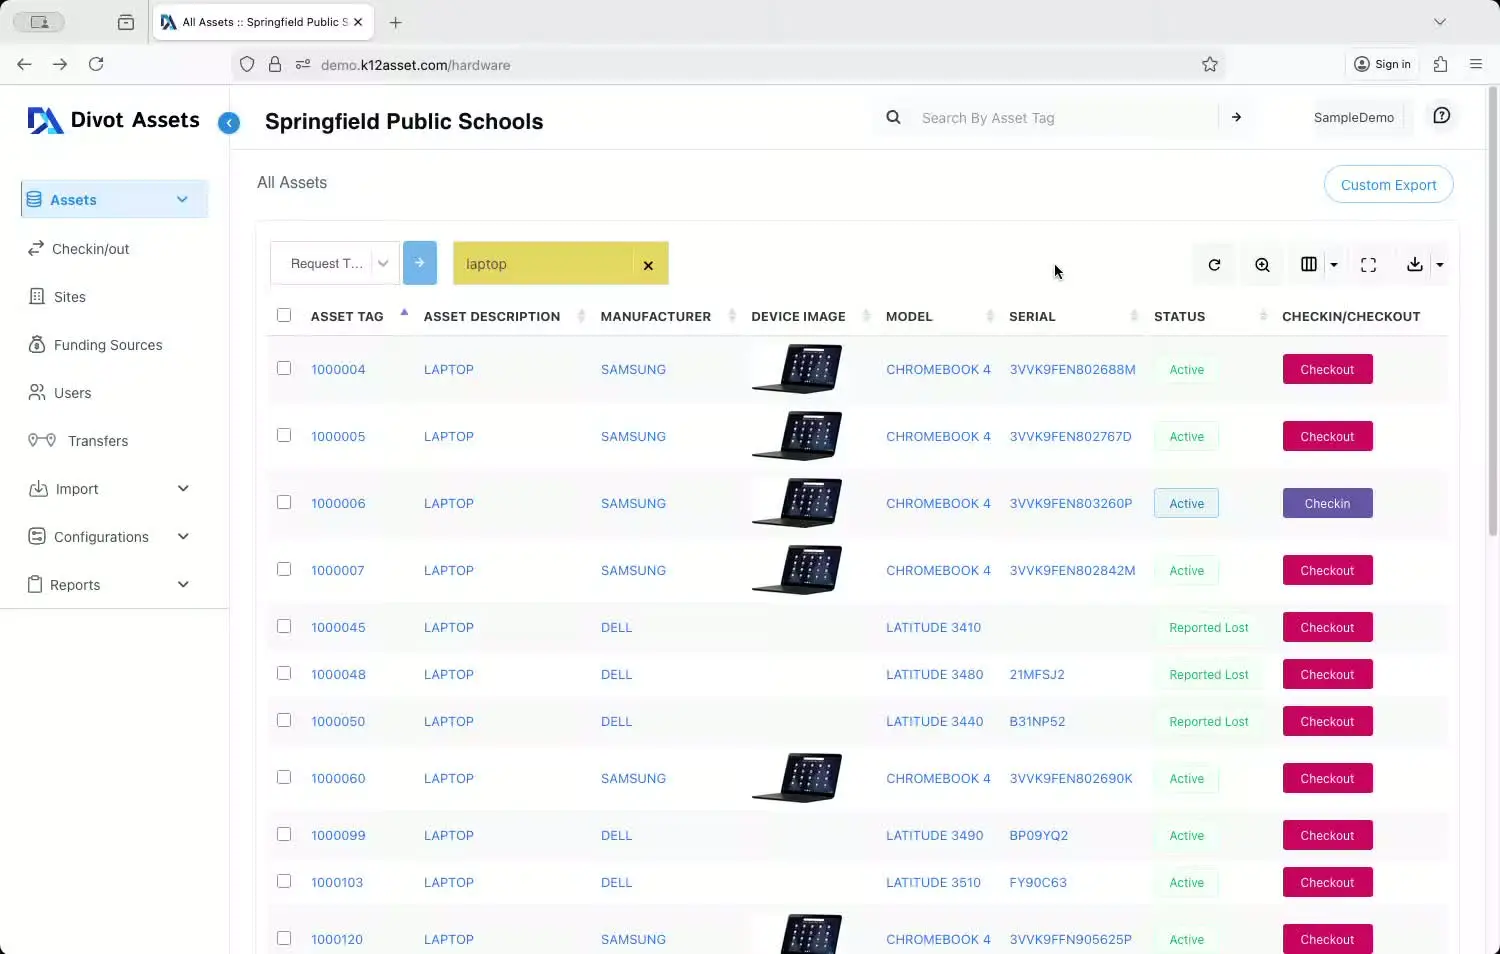
1) Click on the asset tag number to navigate to the Asset’s information page.
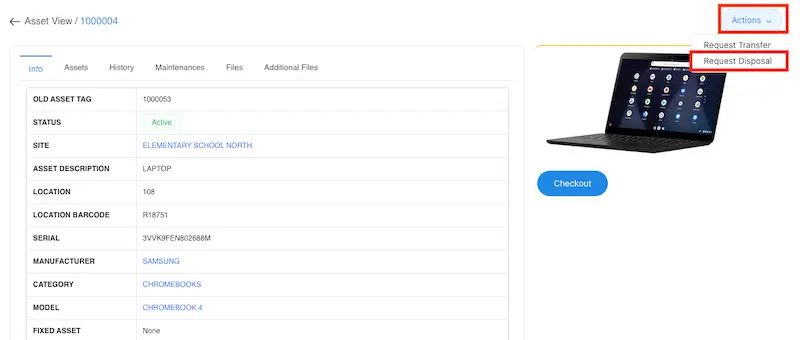
2) In the upper right corner, click on the ‘Actions’ dropdown. Select ‘Request Disposal’ from the options.
3) Complete the following fields in the disposal request form:
Reason for Request: Choose from options like ‘broken’, ‘obsolete’, ‘lost’, ‘stolen’, or ‘other’.
Notes: Provide detailed notes explaining the reason for disposal (e.g., ‘dropped by student’).
Site and Location: Update if the asset has been moved to a new location.
Condition: Optionally update the condition (e.g., ‘broken’).
File Upload: Optionally upload supporting documentation (e.g., photos, police reports)
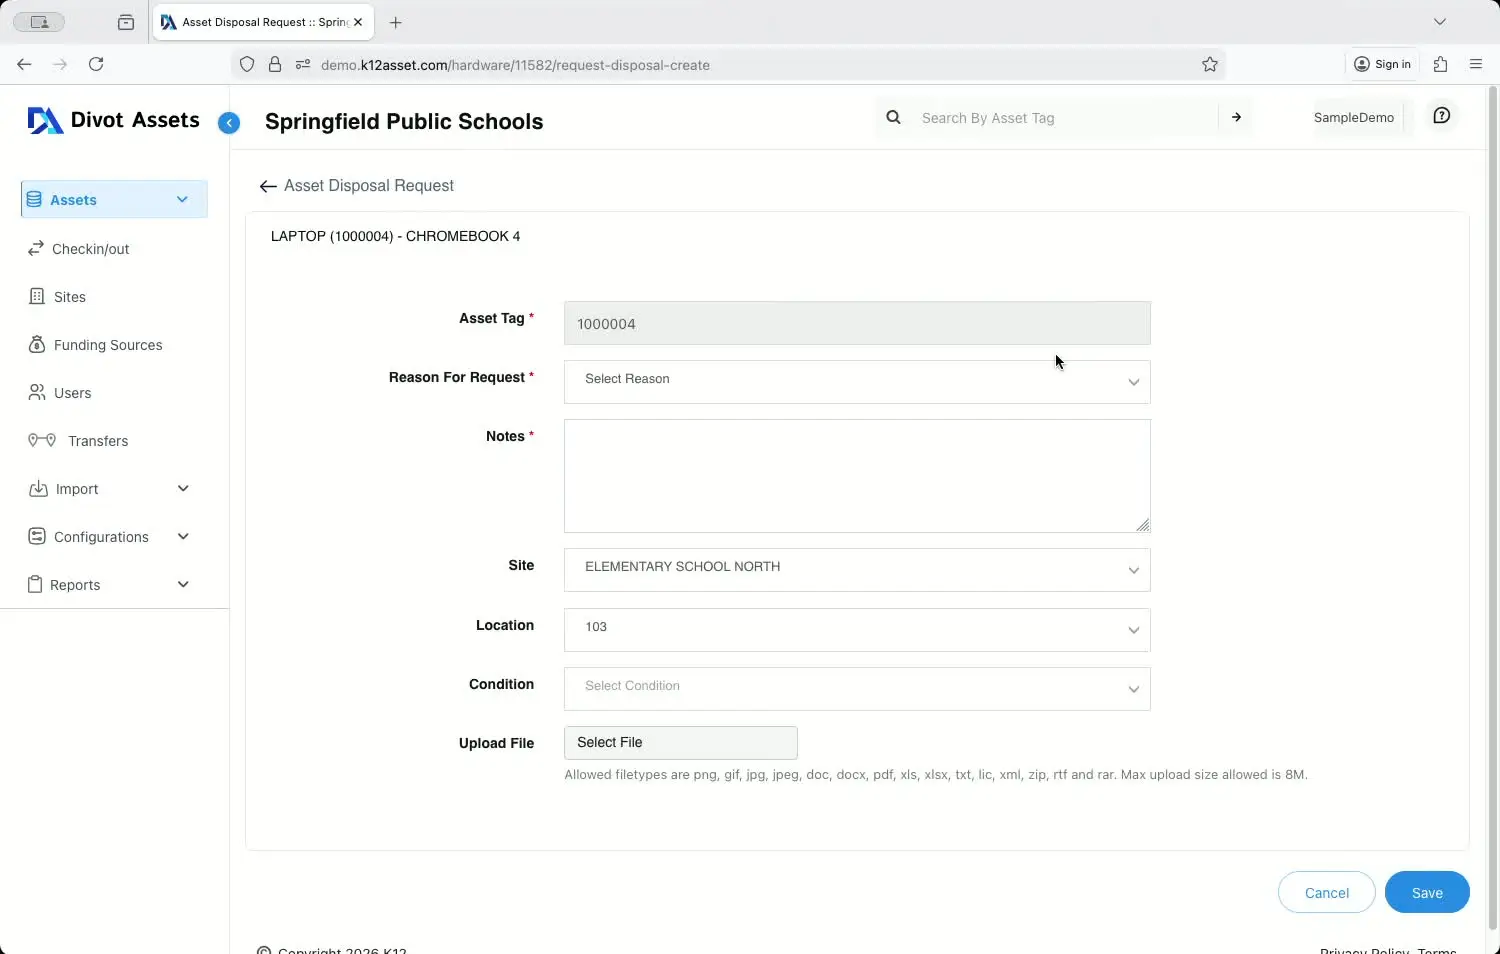
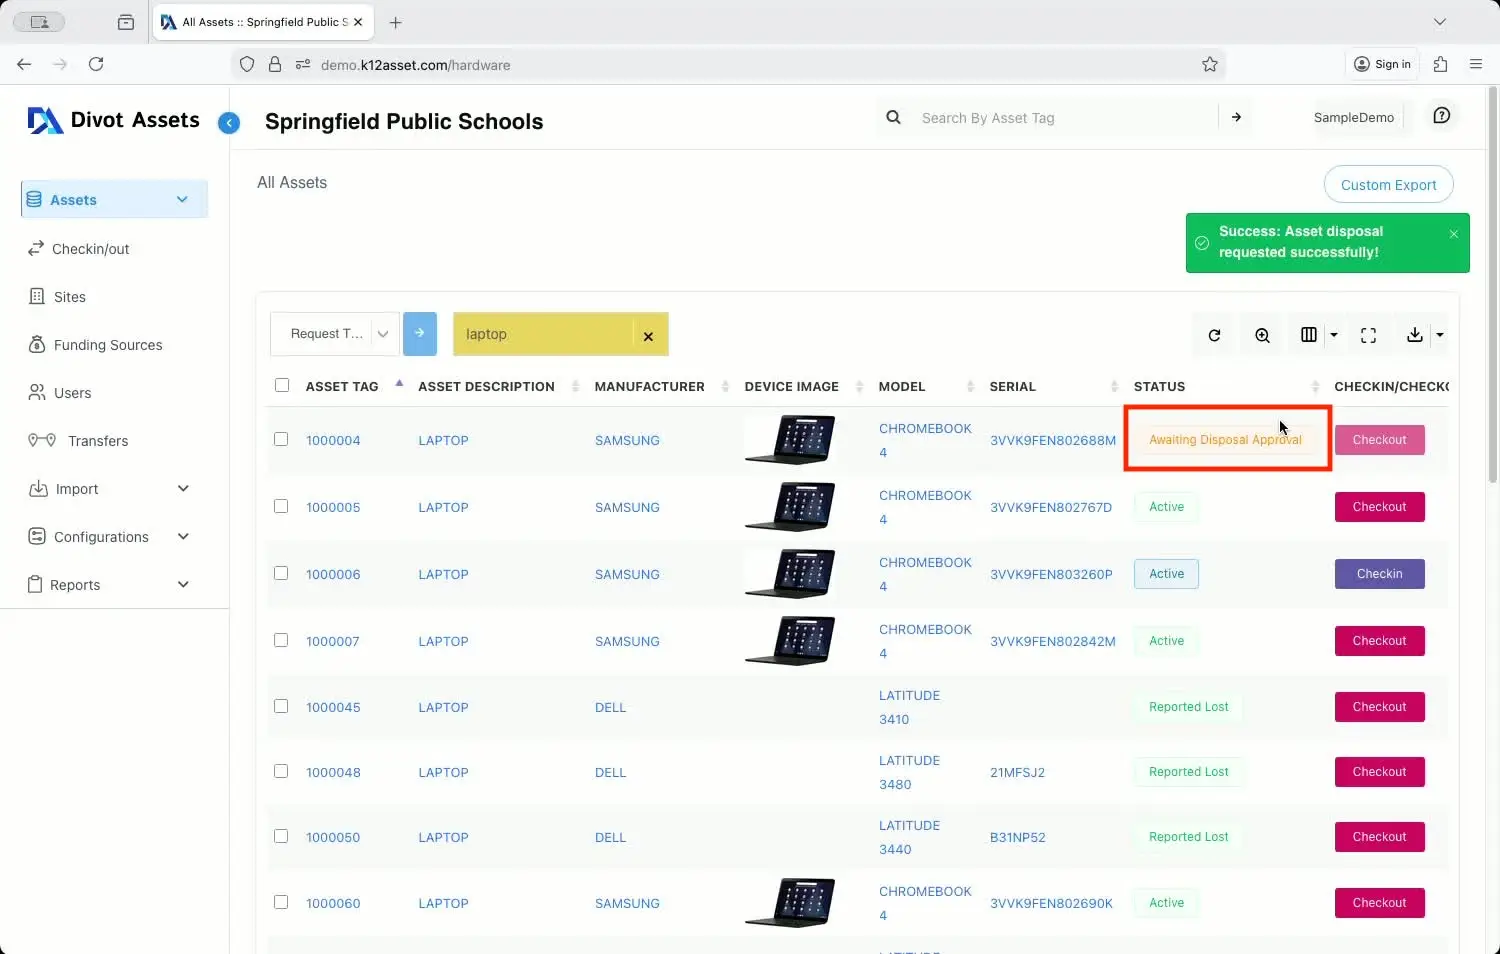
4) After filling out the form, click ‘Save’. The status of the asset will change to ‘Awaiting Disposal Approval’.
5) The appropriate admin will receive a notification regarding your disposal request. Once approved, you will receive an email notification confirming the approval. After receiving approval, proceed with the physical removal of the asset from the district.
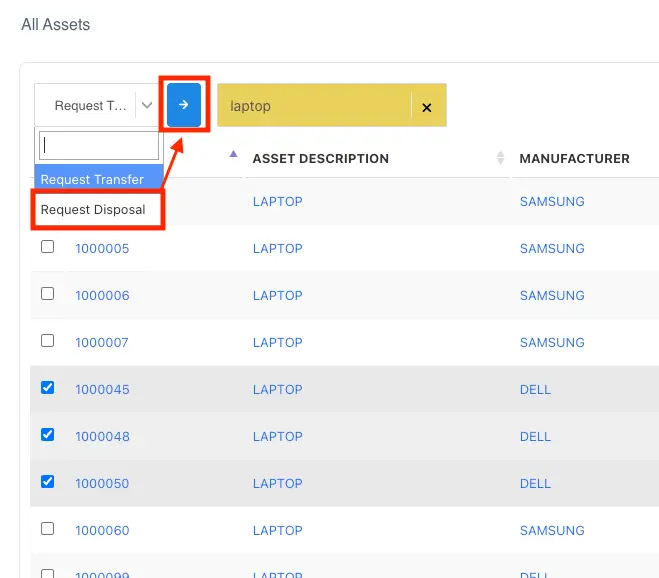
6) To bulk request disposal for multiple assets at the same time:
- Select the check box next to the assets you wish to dispose of.

- Access the bulk action menu and select ‘Request Disposal’.

- Fill out the similar form as above, specifying reasons and notes for each asset.


7) Click ‘Save’ to submit the bulk disposal request. All selected assets will be updated to ‘Awaiting Disposal Approval’ status.