Microsoft Entra ID as SAML Identity Provider
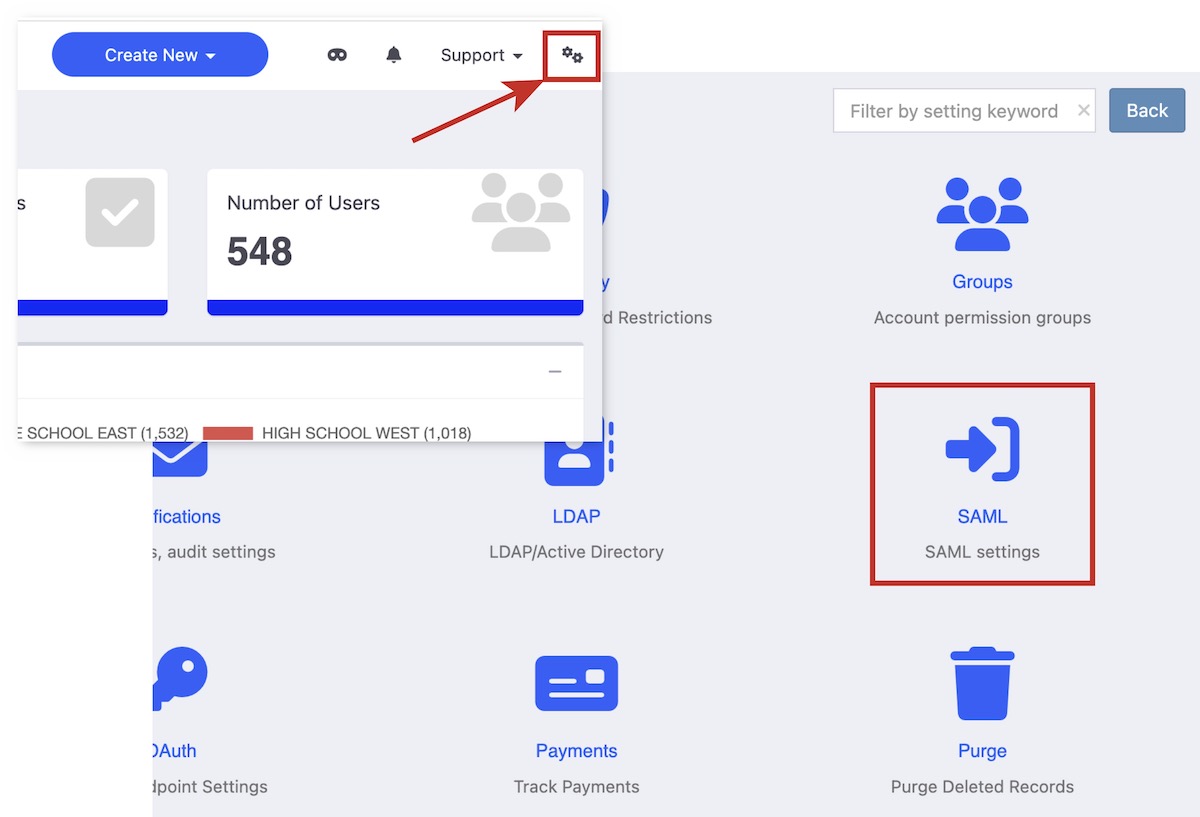
1) Click on the Admin settings in the upper right corner of your screen (double gear icon), then click on the SAML settings.

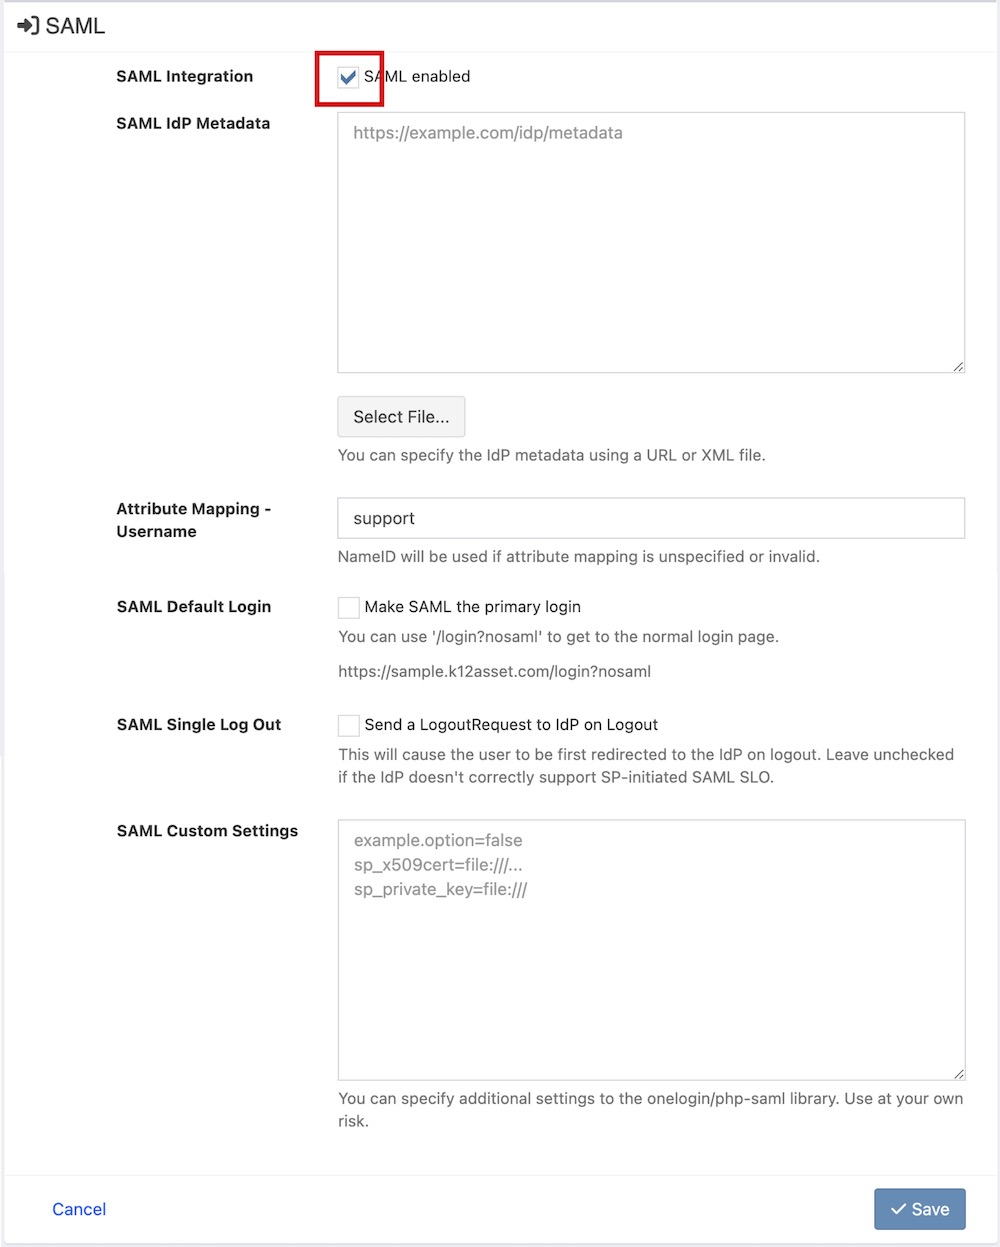
2) Check the box next to “SAML enabled” and then click the Save button.

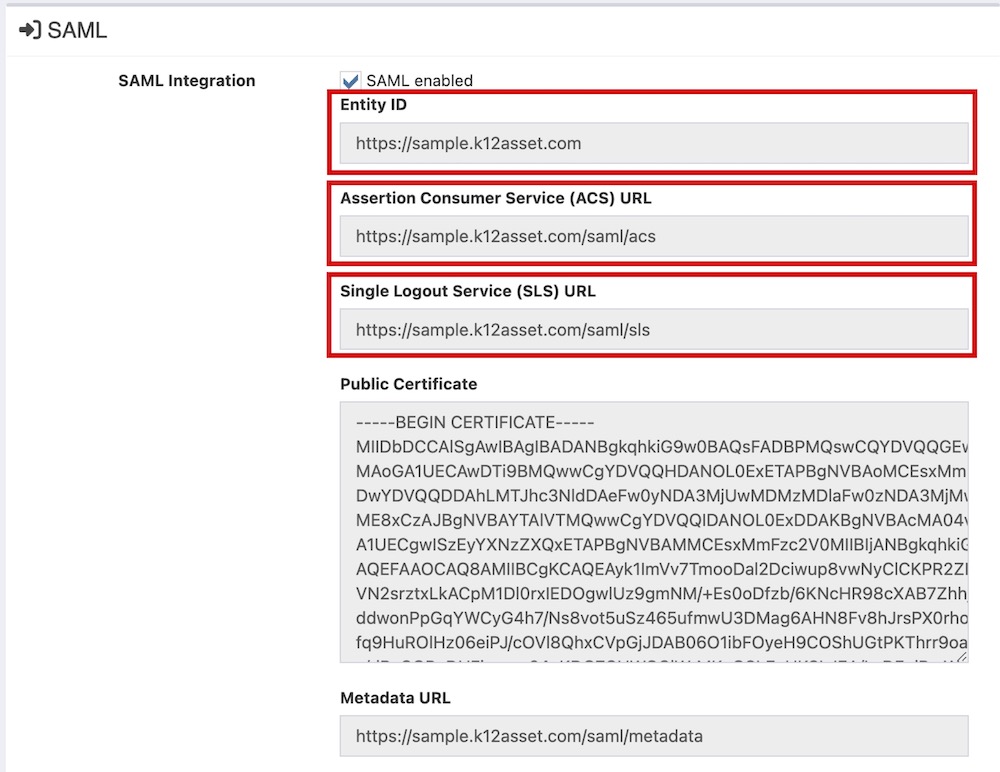
3) You will now see the Entity ID, Assertion URL and Logout URL that you will use in later steps.

4) Log in to your Entra ID account. On the left side navigation under Applications select “Enterprise Applications.”

5) Click on the “New Application” button.

6) Next click on the “Create your own application” button.

7) Give your application a name, we suggest “K12 Asset Pro,” be sure to select the option for “Integrate any other application,” the click on the “Create” button.

8) Next click on “Single Sign-On” on the navigation pane.

9) Choose “SAML.”

10) Select “Edit” from the #1 box (Basic SAML Configuration).

11) In the pop-up box you will add the Entity ID, Assertion Consumer Service URL and Logout URL from K12 Asset Pro that you generated in Step 3 of this guide. Note, your Sign on URL will just be the main URL for your software e.g. https://sample.k12asset.com

12) After you have filled in these URLs you can click the “Save” button and then close the pop-up box.

13) Next click on the “Download” button next to Federation Metadata.XML. We will use this file in Step 15.

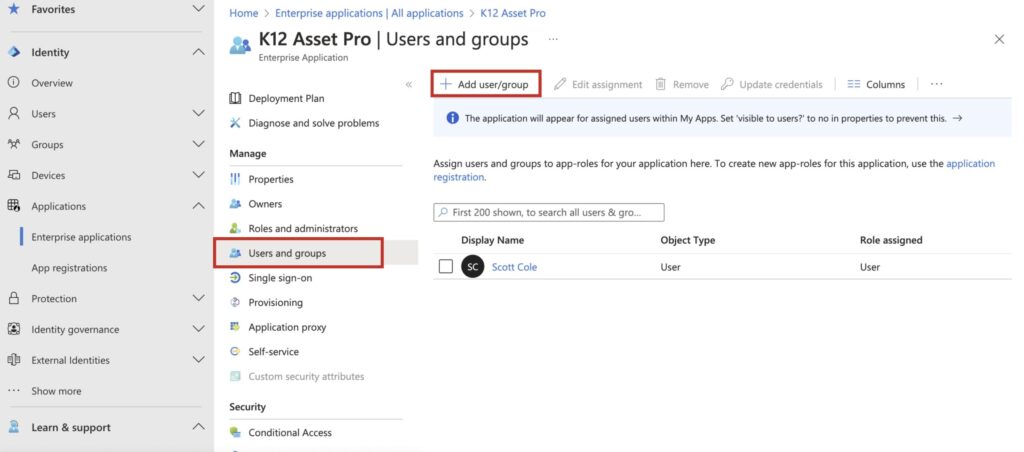
14) In the navigation pane click on “Users and groups” then click on “Add users/group” to add either individual users or groups to the K12 Asset Pro application. Users or groups must be added to the application in order for their login authentication to be successful.

15) Open the XML file that you downloaded in Step 13 using TextEdit or Notepad. Select and copy the full contents of this file.

16) Return to your K12 Asset Pro setup and paste the data from the XML file in the box labeled “SAML IdP Metadata.” If you would like all users to sign with with your SAML provider you can select the check box next to “SAML Default Login.” Note, if you select SAML as your default login you can use the indicated URL to circumvent the SAML login if needed, for example if there are any issues with your SAML connection. Click “Save” and your set up is now completed! It may take a few minutes for the new settings to propagate and sign-in with SAML to be available.

17)