Google as SAML Identity Provider
Google only will allow you to authenticate via full email address, not “short usernames”.
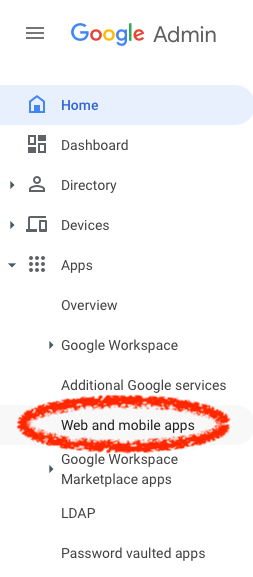
First, go to https://admin.google.com, and navigate to “Web and Mobile Apps”

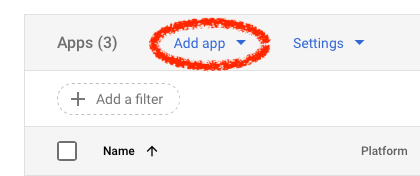
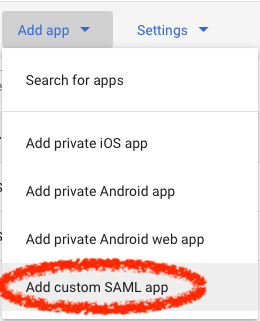
Click Add App > Add custom SAML App


Give the app a useful name such as”K12 Asset Pro”.
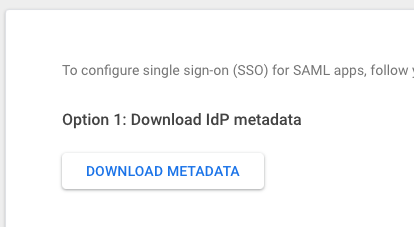
When you get to the Google Identity Provider details, choose to ‘download the IdP Metadata’.

Open that file in a text editor, and paste its contents into the K12 Asset Pro text area that says “SAMl IdP Metadata”. Turn on Make sure to check “SAML enabled” and click save – then you’ll see values for the Entity-ID, ACS URL and the SLS URL.

Paste those values into the appropriate fields in the Google setup. When prompted for “Additional attributes” you don’t need any.
Click Finish. Then, make sure to enable your Google SAML App for all users in your organization (or whichever subset you choose).


Click ‘ON for everyone’ and click ‘SAVE’
Please note that it can take up to 24 hours for Google’s setup process to complete!
This usually means you have to wait for Google to finish setting up your App. Please be patient, as this can take up to 24 hours!
SAML Force Login
When this checkbox is enabled, you will not see a login form of K12 Asset Pro anymore when you go to the K12 Asset Pro website. Instead it will redirect you directly to the IdP SAML Login.
When you need to see the login form of K12 Asset Pro to login with an existing user without SAML login, you could add the following query parameter to your K12 Asset Pro URL: /login?nosaml:
https://yourdistrict.k12asset.com/login?nosaml
This might be useful when there are some technical problems with your IdP to be able to sill login to K12 Asset Pro. For this scenario, make sure that there is an “admin” user in the K12 Asset Pro user database, who does not login via SAML.